Module Developer Guide
Table of Contents
Overview
Appleseed Portal uses .NET modules to extend functionality. Below is how to develop a simple C# module and deploy it into appleseed portal.
Development
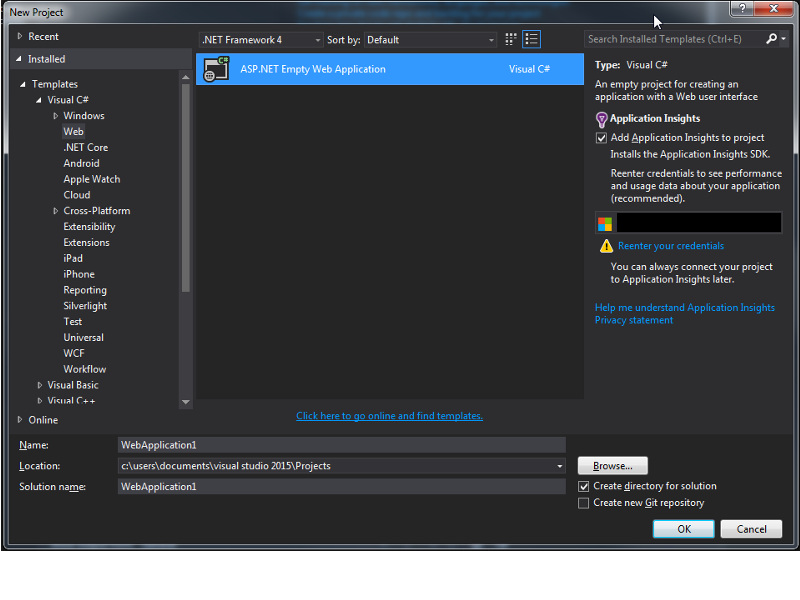
Open Visual Studio 2015
If you don’t have it, you can download it here.
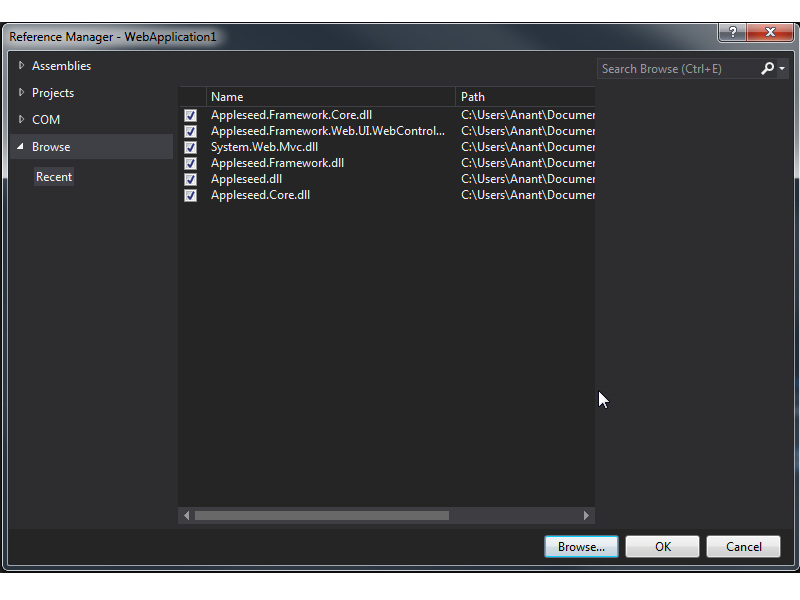
Copy the Appleseed Portal DLL’s from a standard installation \bin folder into your project application’s \bin folder, and then make a reference in your project
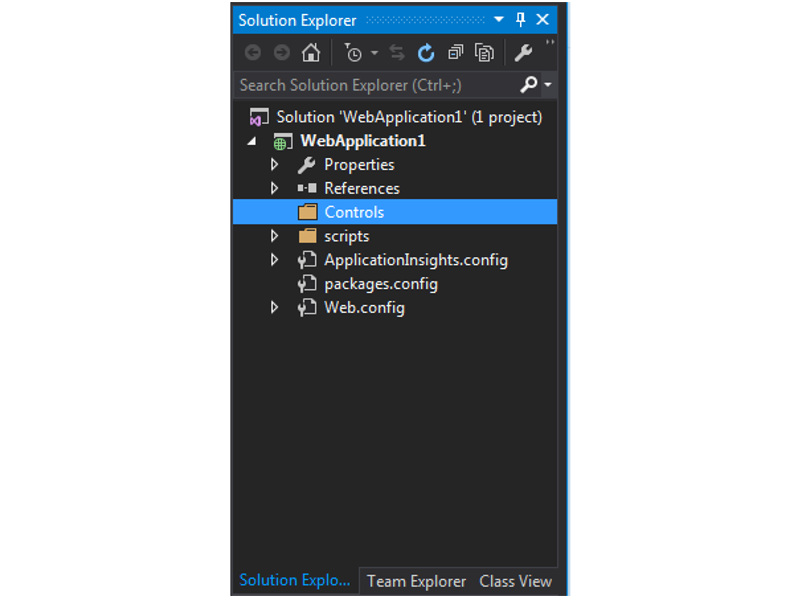
Create a \Controls directory to store modules.
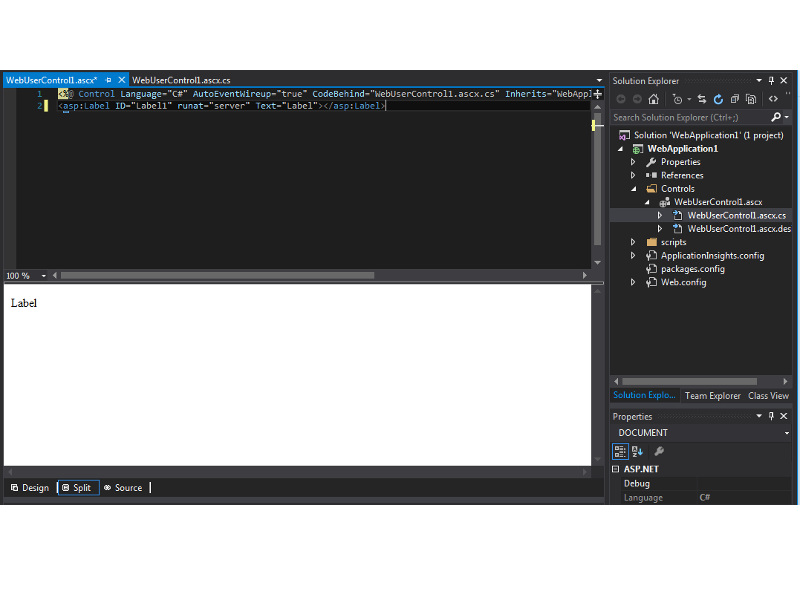
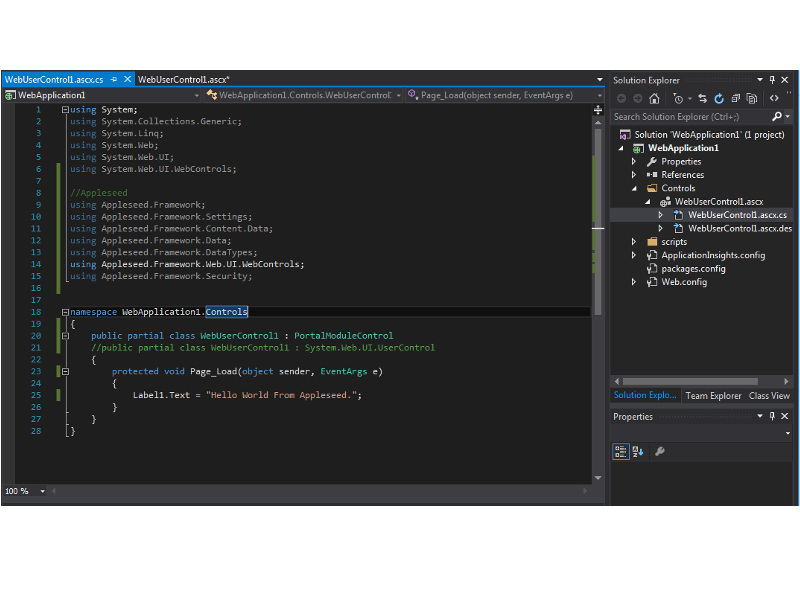
Create a Web Form User Control under above directory. Make sure your user control is in Appleseed module mode by inheriting from PortalModule Control instead of System.Web.UI.UserControl.
Compile it (build > build solution).
Deploy your ASCX User controls to your Appleseed Portal DesktopModules\CustomModules\<Module> directory (create CustomModules folder if doesn’t exist yet).
Deploy your main and dependent assemblies to your Appleseed Portal \bin directory (.cs files are not required).
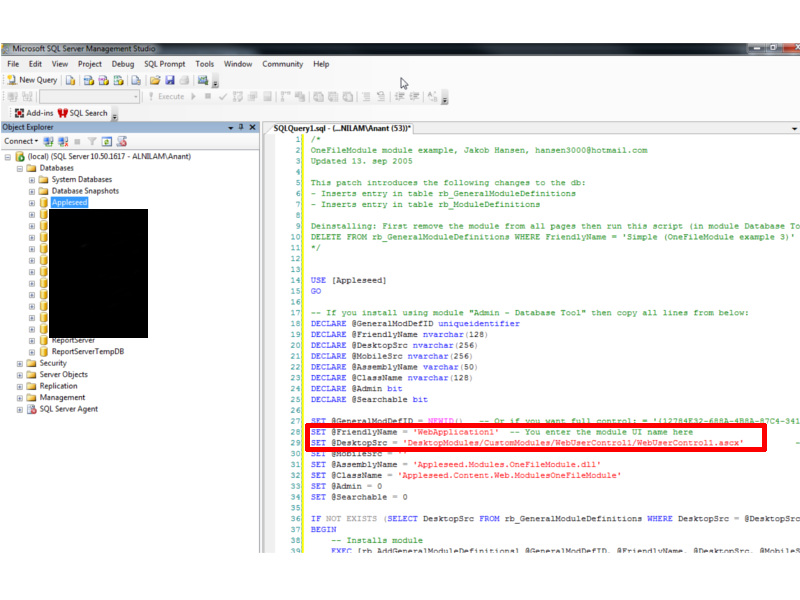
- Run the Install SQL Script on your Appleseed Portal installation Database. The script is located here in a standard Appleseed Portal install root\DesktopModules\CommunityModules\OneFileModule\CSharp Examples\Simple\DBPatch.sql
- Simply change the following script values
@FriendlyName - The name of your module within appleseed
@DesktopSrc - The location of your .ascx main view i.e : DesktopModules\CustomModules\<Module>
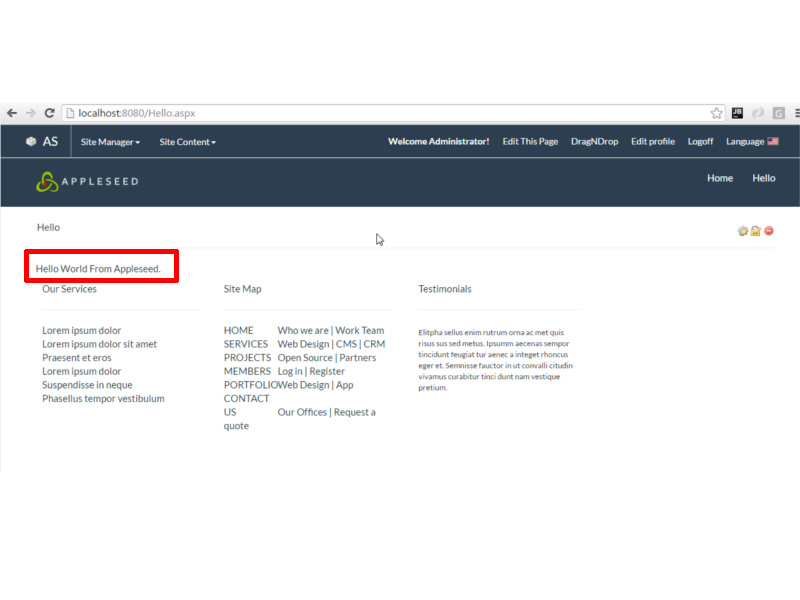
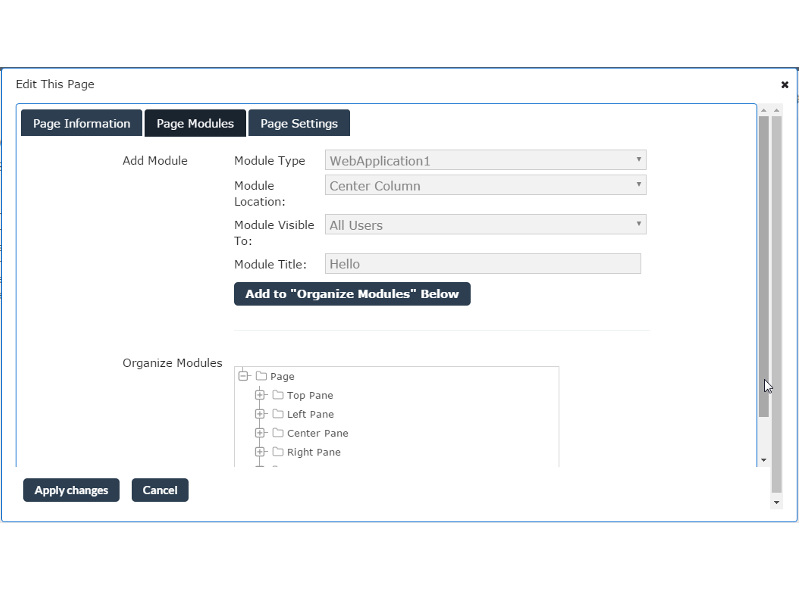
Add your module to a test page
Use edit this page to add your module to a test page and make sure it does not crash the page.
Usual Scenarios for your module to Fail to load.
- All dependent dlls are not added to your bin directory.
- The location of your ascx file in your install script was incorrect.
- Web.config changes are not transferred from your project web.config to your appleseed portal web.config
If you have installed your module correctly, you should see your module on the page