Appleseed Portal Installation
Quick Install
- Requirements
- .NET Framework 4.6.1 : https://www.microsoft.com/en-us/download/details.aspx?id=49981
- Windows 7 | 8 | 10+ Physical or Cloud Instance
- SQL Server All Editions (Express tested) 2005 - 2016
- Visual Studio 2015 All Editions (Community Tested) for development
Grab the Latest Release
- Grab the latest release : https://github.com/Appleseed/portal/releases
- Scroll to the bottom and download the zip file.
Or watch the video here.
Database
Download Microsoft SQL Server Express if you do not already have it : https://msdn.microsoft.com/en-us/sqlserver2014express.aspx?f=255&MSPPError=-2147217396
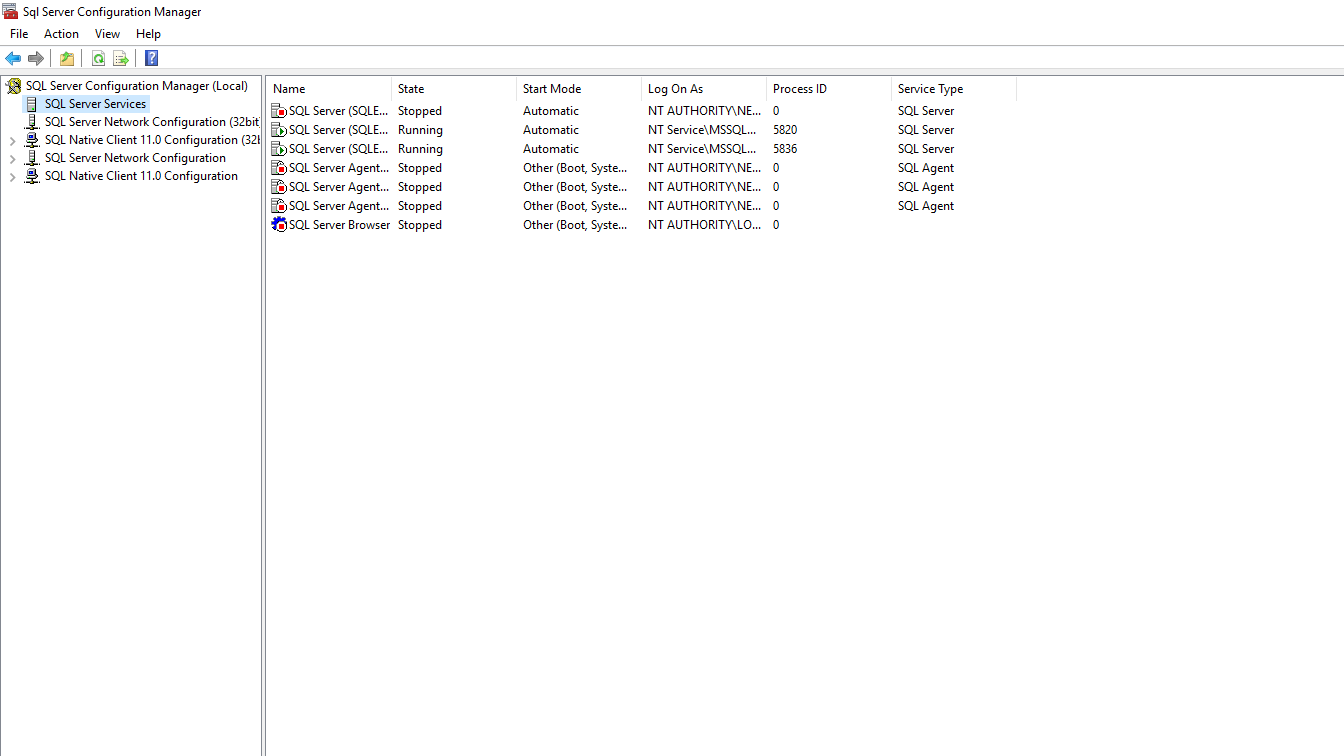
Launch SQL Server Management Studio and connect to the server instance you have installed.
If there is an issue connecting to the server, launch SQL Server Configuration Manager or service and start the MSQQL services.
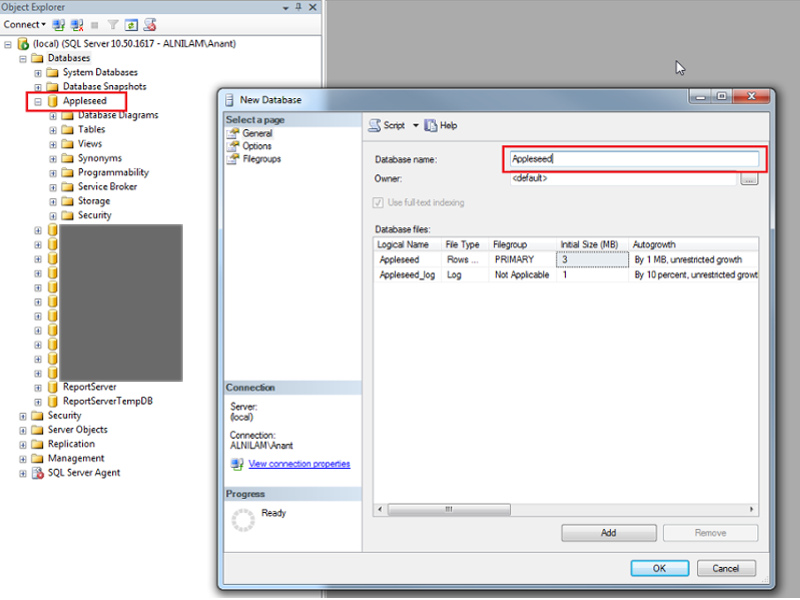
- Create an Empty SQL Server Database in a SQL Server Instance.
- Right click on the Databases folder in the Object Explorer on the left and click on “New Database”.
- Enter a name in the Database Name field IE Appleseed.
- Click ok to create your new database.
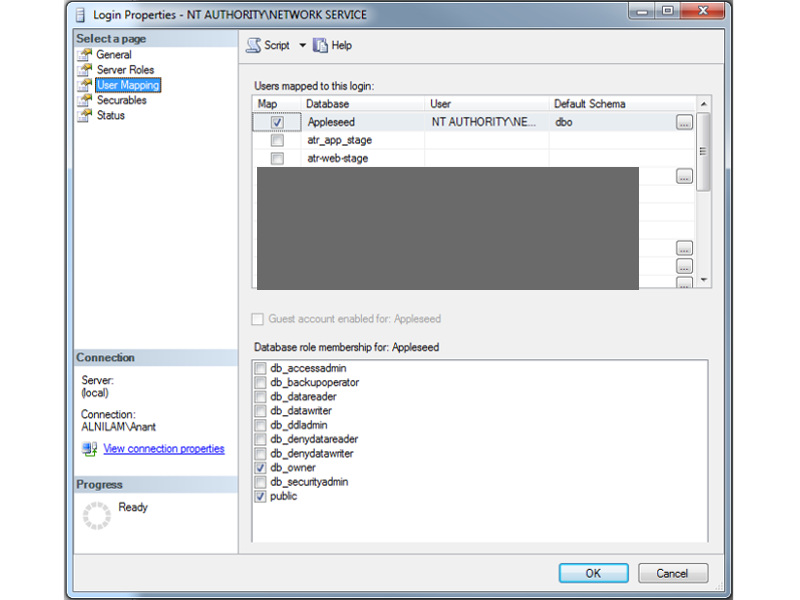
Set up NT AUTHORITY/NETWORK SERVICE as a Login if it doesn’t exist
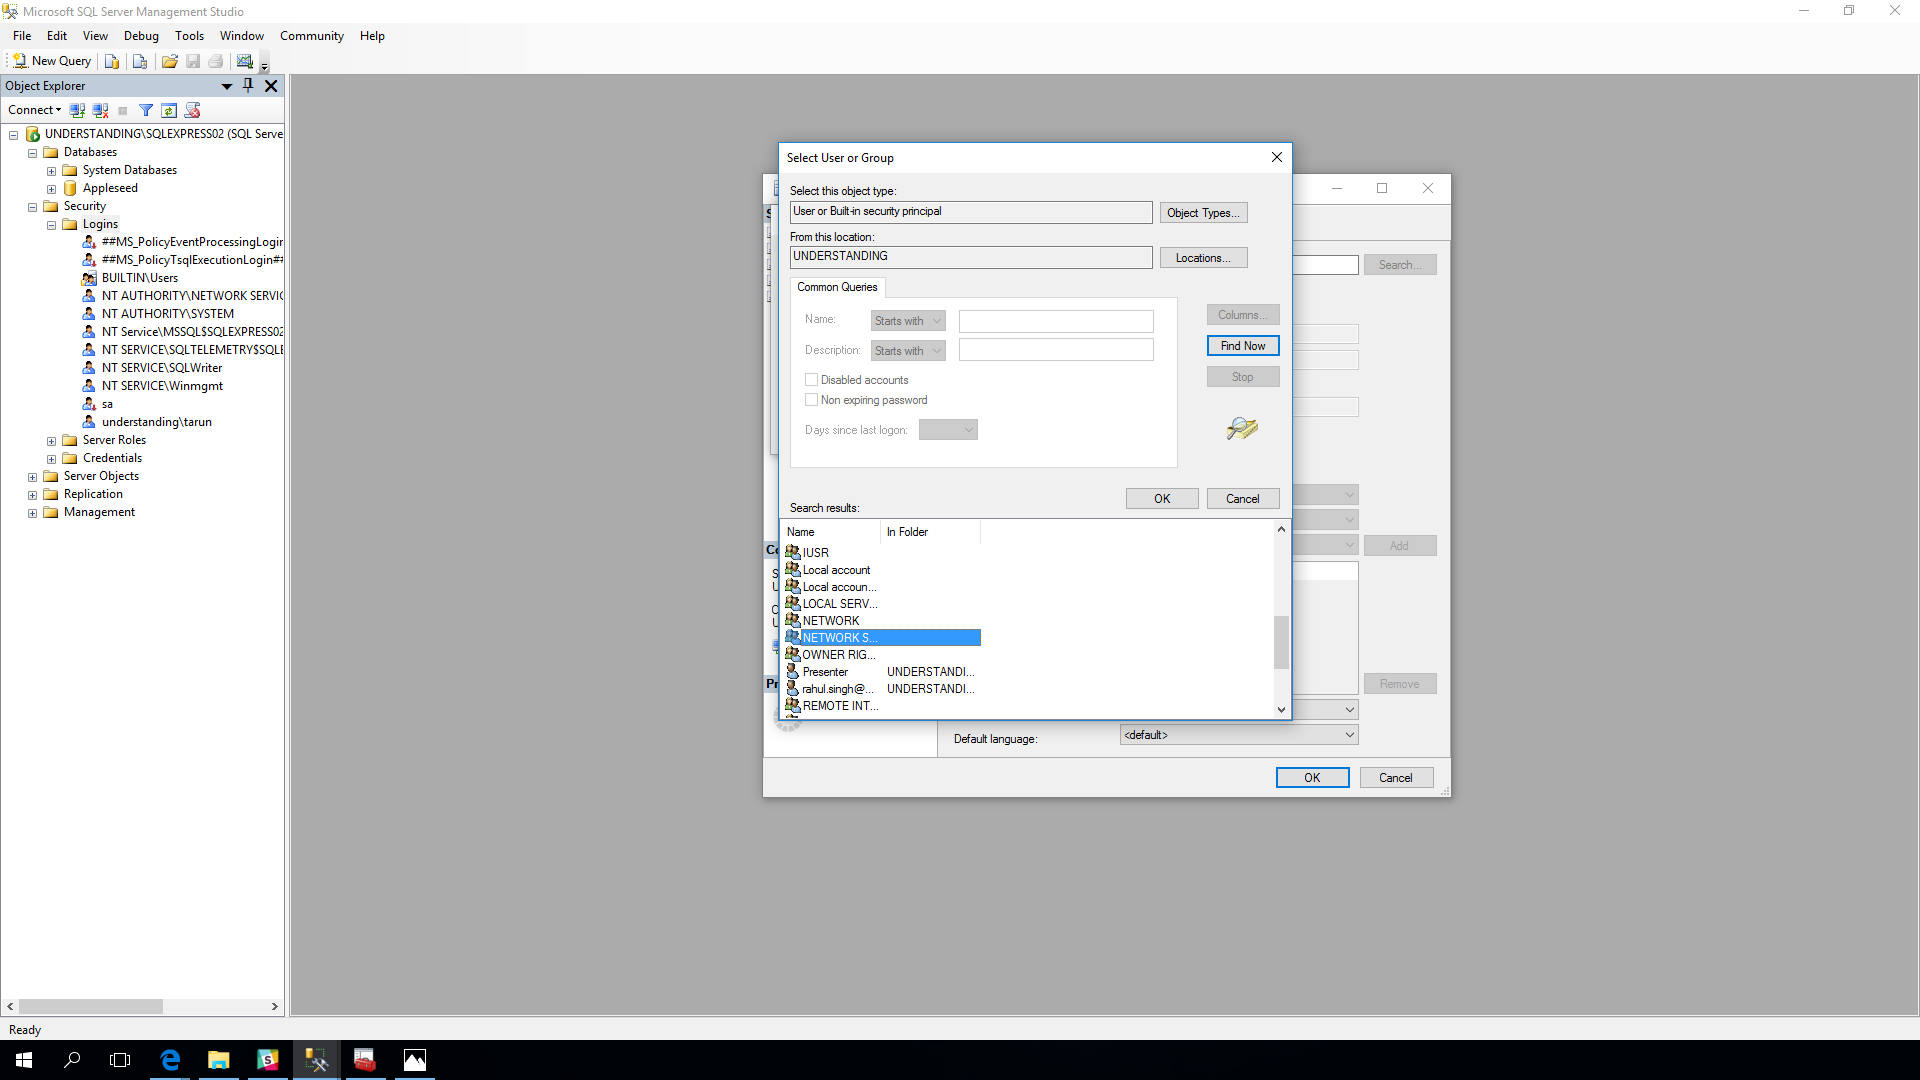
- Right Click on the Logins folder in the main Security folder located at the bottom left.
- Select “New Login..”.
- Click on the Search button next to the Login Name field.
- Click on the “Advanced…” button.
- In this next window, click on the “Find Now” button on the middle right side.
- Find “NETWORK SERVICE” in the list, highlight it and click on “OK”.
- Click “OK” in the next window.
Give a user access to your SQL Server Database [ Network Service is recommended ]
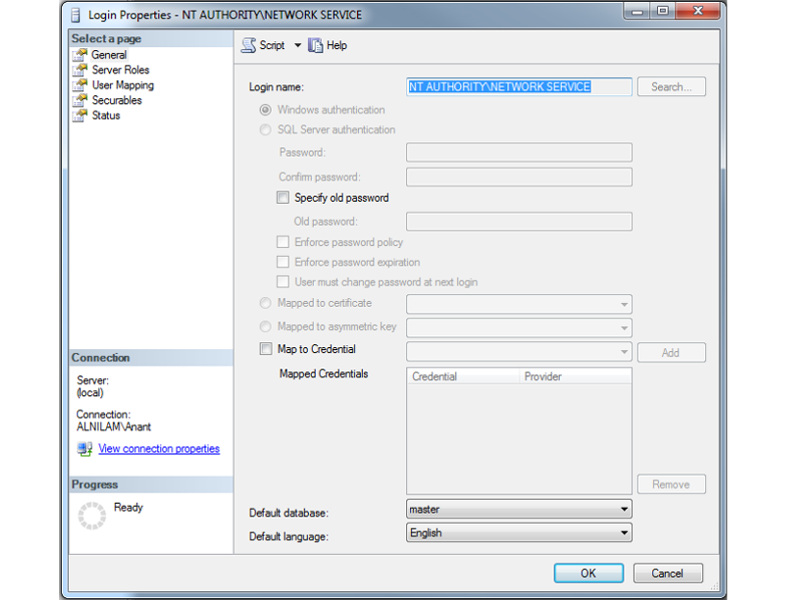
Give this user db_owner in the user mapping section to your Database
Or watch the video here.
Set up the Appleseed Site
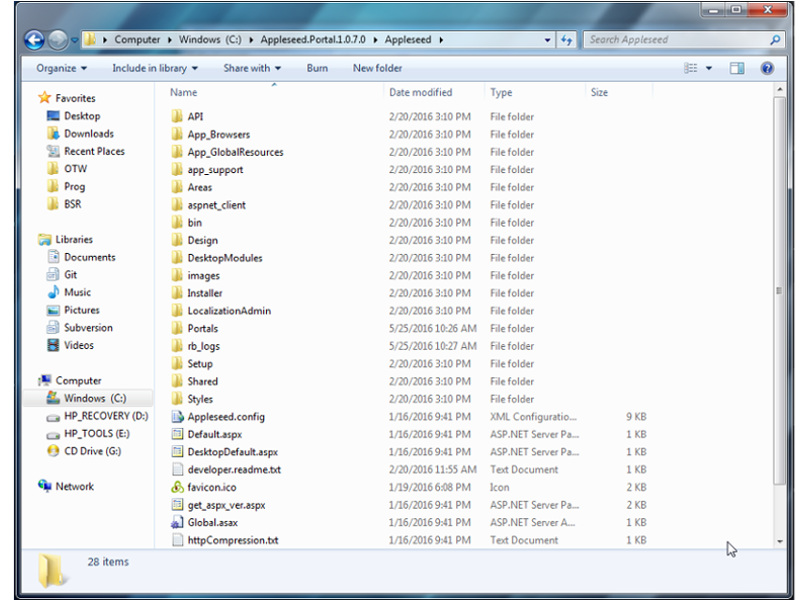
Unzip the archive to a non-windows controled folder such as C:\Appleseed [ ie : Not the Windows folder or folders locked ]
Change permissions on the Appleseed directories
Right click on the Website Folder (e.g. / Appleseed Website).
Click on the Properties button at the bottom.
Click on the “Security* tab at the top (third from the left).
Click on the “Edit” button, then the “add” button, then the “Advanced…” button.
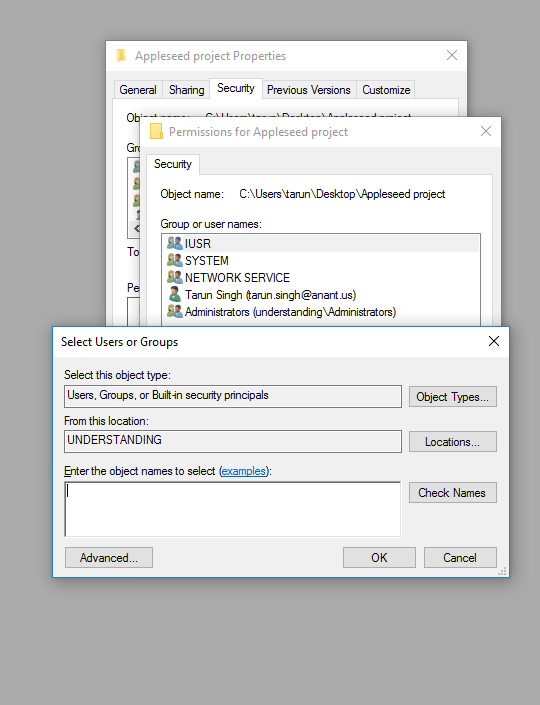
In the next window click on the find now button in the middle.
Find “NETWORK SERVICE” in the list, highlight it, and click “OK”.
Click “OK” in the next window.
In the next window, highlight “NETWORK SERVICE”, click on the Full Control checkbox in the Permissions box, then click “Apply”.
Click on the “Edit”, “Add”, “Advanced…” and “Find Now” buttons again.
Find “IUSR” in the list, highlight it, and Click on “OK”.
Click “Ok” in the next window.
In the next window, highlight “IUSR”, uncheck all except the “Read” checkbox in the Permissions box, then click “Apply”.
Click “OK” in the remaining windows.
Or watch the video here.
- IIS Hosting
Open Internet Information Services (IIS) Manager.
In the Connections section, click the grey triangle next to the Computer’s name to access the Sites folder.
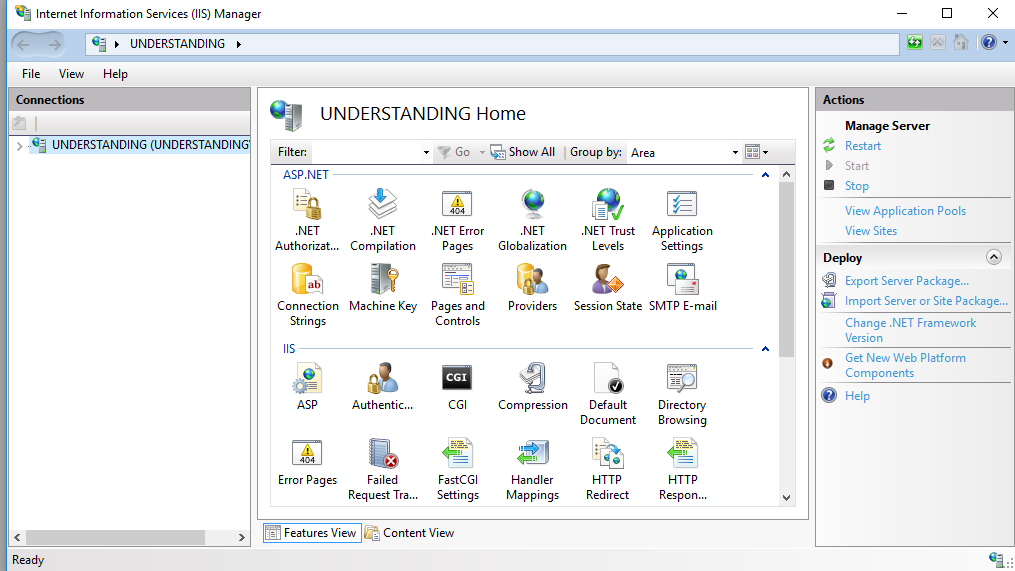
Create a Site in IIS with a .NET 4.0 Application Pool.
- Right click on the Sites folder and click on “Add Website”.
- Enter the Site name (e.g. Appleseed.Website).
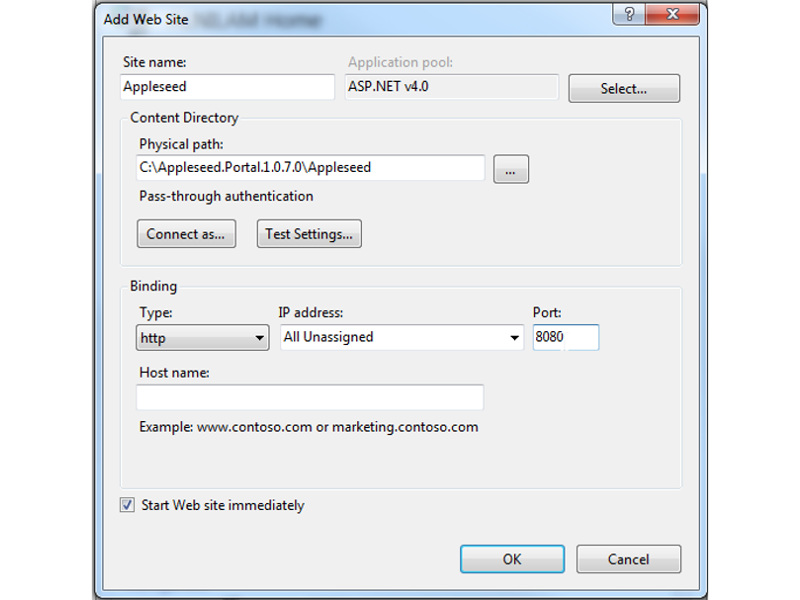
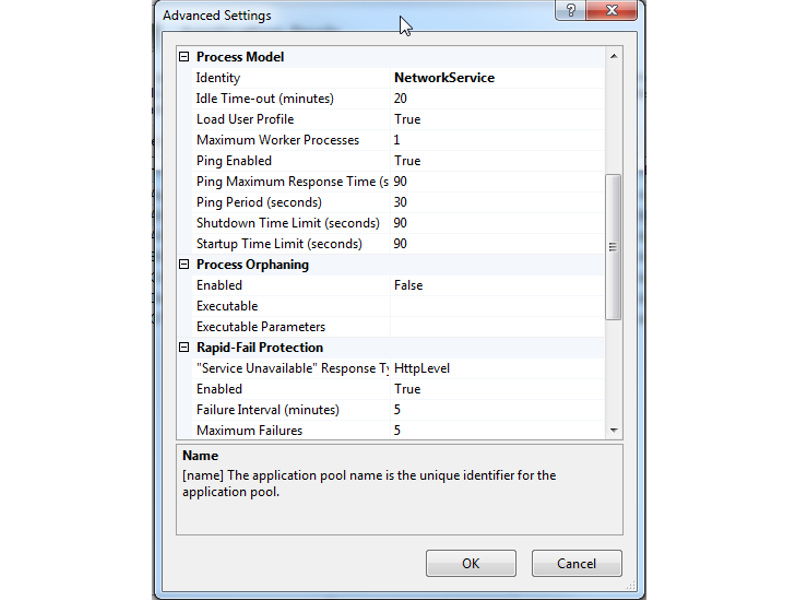
Change the Identy on the Application Pool to Network Service [ The site will run under this identity ]
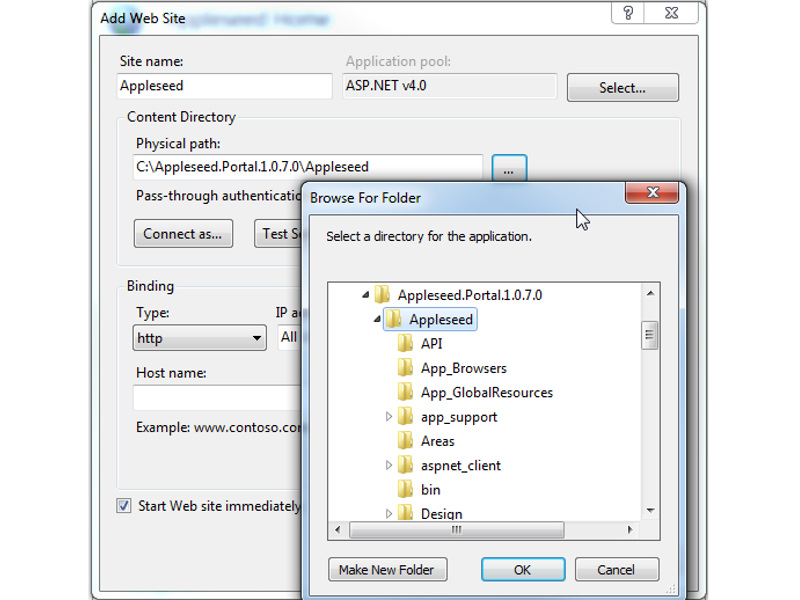
Point the IIS site folder to C:\Appleseed or where you unzipped your archive
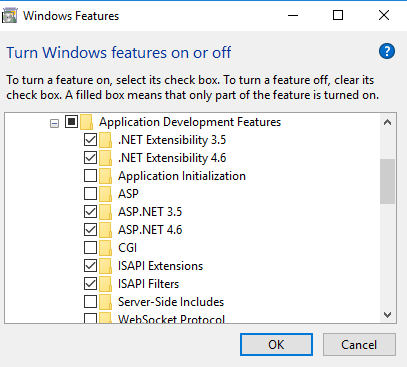
If you have never used your computer for Web Hosting before, you may get the following error.
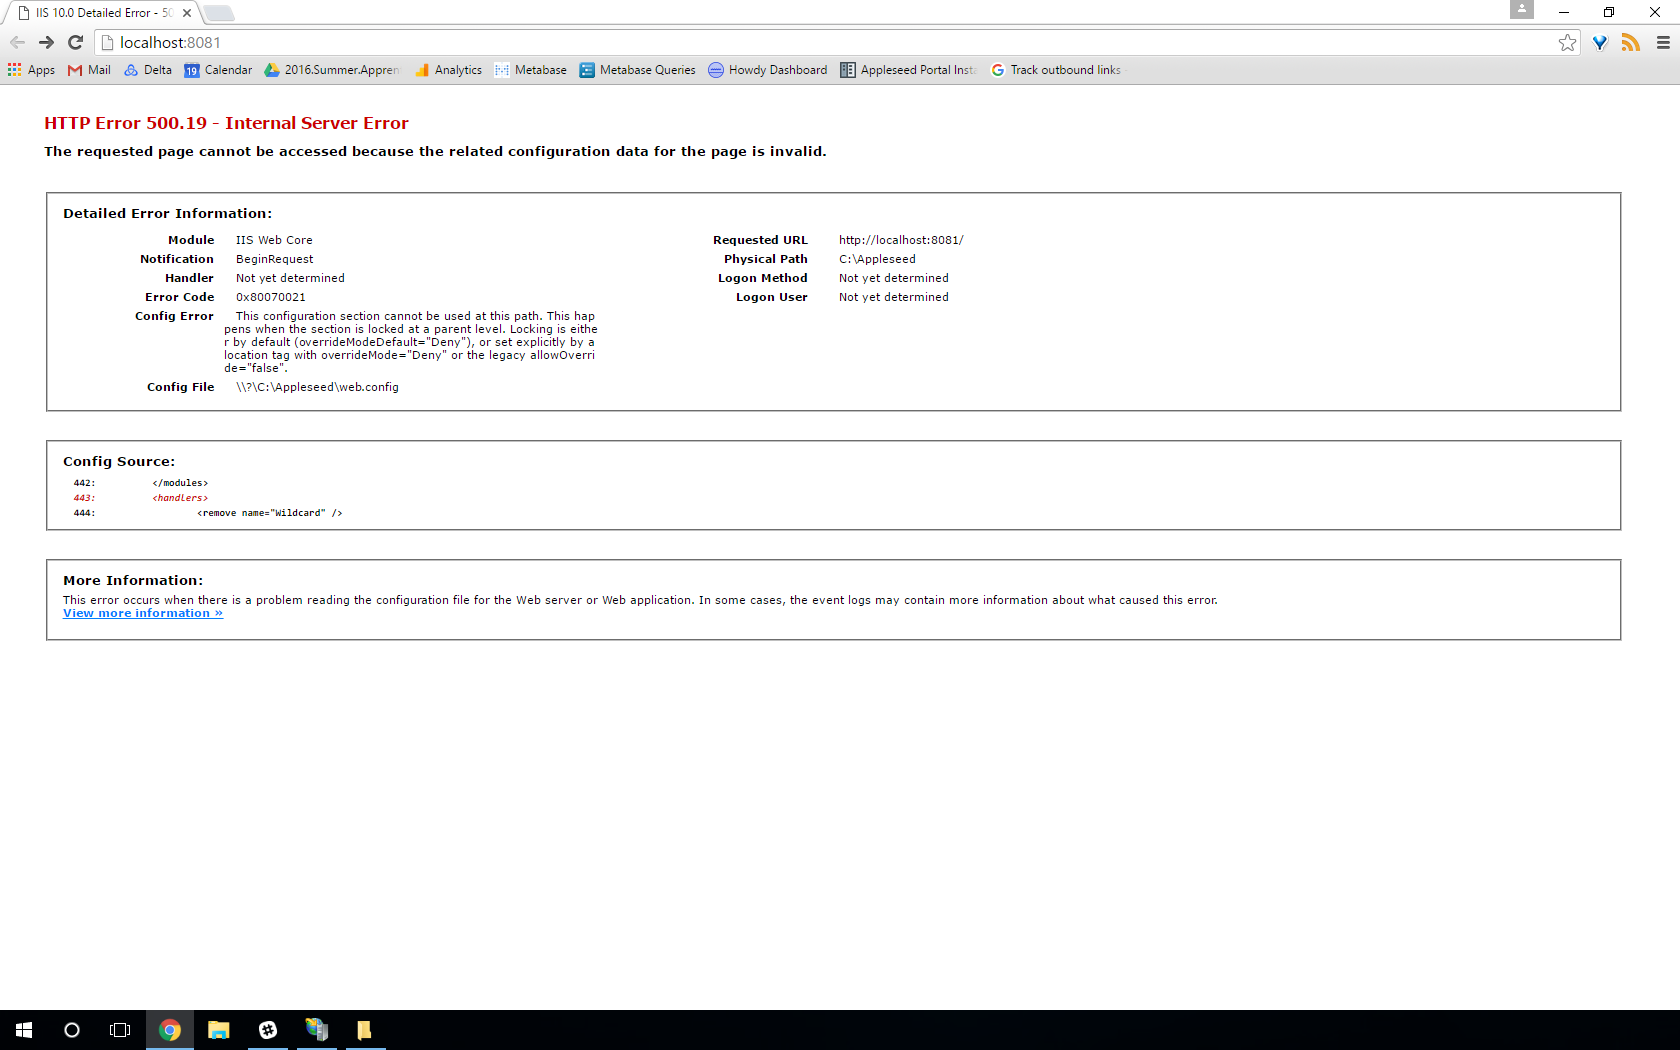
To fix this, type “Windows Features” in the Control Panel. Expand the “Internet Information Services” folder. Expand the “World Wide Web Services” folder. Expand the “Application Development Features” folder. In this folder make sure to check the following boxes.
Or watch the video here.
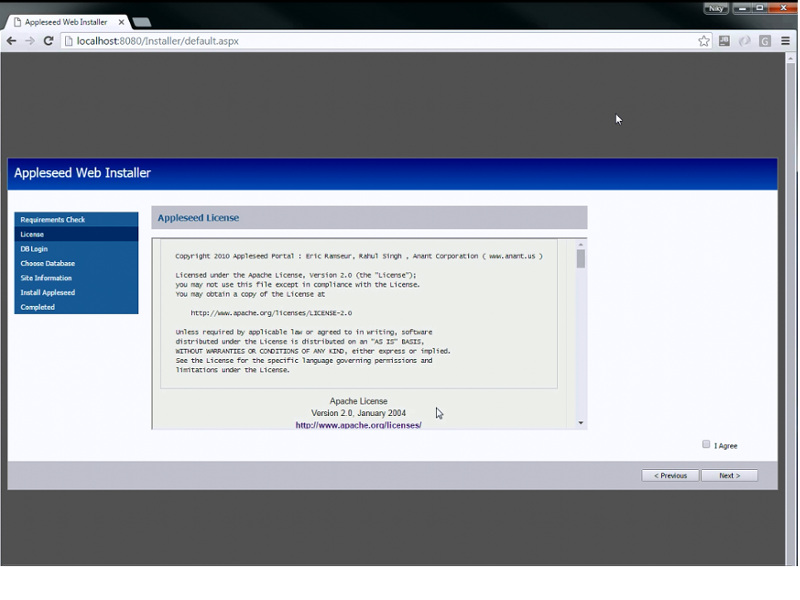
Browse your Site which will cause a redirect to the Web Installer
 Or watch the video here.
Web Installer
Follow the Instructions of the Web Installer
Give write access to the Identity [ ie NetworkService ] of your Application Pool to the below Files and Directories

- The Web Installer will do an environment check to ensure the proper permissions
- Web.config – Needs write if you want the web installer to set your web.config up for you [ recommended ]
- This should be removed after install
- \rb_logs – Needs write to provide error / info logs
- \Portals – Needs write to allow writing site files
Post Installation
On successful installation you should see a bootstrap theme and a login
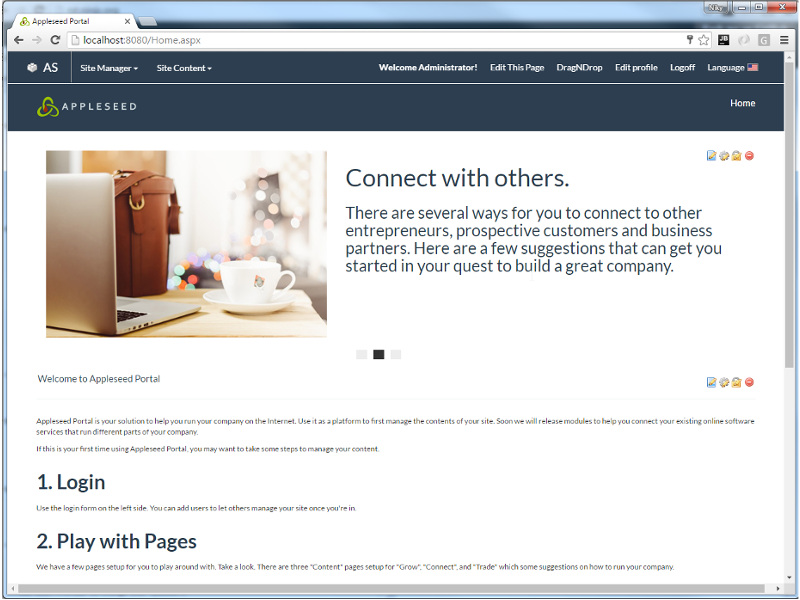
Use the default login admin@appleseedportal.net | admin
Use Edit Profile to change your password